- This document provides detailed assembly instructions for the fully 3D printed revolver with working double-action mechanics. Follow the steps carefully to ensure a successful assembly.
- All parts are 3D printable, no additional hardware or tools required, however there are some optional recommendations below.
- Decorative parts like the covers and the grip can be printed in either PETG or PLA.
- Mechanical parts like the springs, hammer, trigger etc. should be printed in PETG for best results.
- All parts can be safely printed in PETG.
- For the best print orientation refer to the oriented parts 3mf file.
- It's highly recommended to use supports where needed with the provided orientation.
- The largest part is 20 cm long, all other parts should fit in most printers.
- 3D printer and slicing software
- Optional tools for preparing the printed parts: sandpaper, flush cutters, pliers
- Some parts can be glued together for a more permanent fit without affecting the functionality, these parts are indicated in the instructions below.
- Optional recommendations:
- Lubricant (silicone, PTFE, etc.) - makes the revolver action run smoother
- Glue - some parts can be glued together for a more permanent fit without affecting the functionality, these parts are indicated in the instructions below.
| [ ] Barrel1 | [ ] Frame2 |
| [ ] Barrel2 | [ ] Front-sights |
| [ ] Bottom-front-cover | [ ] Grip |
| [ ] Bullet | [ ] Hammer |
| [ ] Cover-back-top | [ ] Handle-bolt |
| [ ] Cover-back | [ ] Handle |
| [ ] Cross-bar | [ ] Knob (x2) |
| [ ] Cross-bolt-nut | [ ] Ratchet-lever |
| [ ] Cross-bolt | [ ] Ratchet |
| [ ] Cylinder-bolt-nut | [ ] Screw-2 (x2) |
| [ ] Cylinder-bolt | [ ] Screw (x4) |
| [ ] Cylinder-lock | [ ] Spring1 |
| [ ] Cylinder-stop | [ ] Spring2 |
| [ ] Cylinder | [ ] Stand |
| [ ] Flap | [ ] Top-front-cover |
| [ ] Frame-cover | [ ] Trigger |
| [ ] Frame-lock | [ ] Trigger2-link |
| [ ] Frame | [ ] Trigger2 |
- Always wear safety goggles when assembling.
- Ensure that the workspace is clean and organized.
- Be cautious of sharp edges on printed parts.
- Check local laws before assembling or displaying the revolver.
Full assembly video:
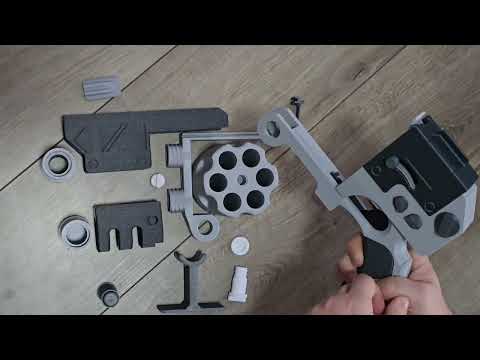
- Gather all printed parts and additional components.
- Inspect each part for defects or issues.

- (optional) These parts can be lubricated at their contact points to ensure smoother operation.


- (optional) These parts can be lubricated at their contact points to ensure smoother operation.


- (optional) These parts can be glued together.


- The grip slides onto the handle from the top.
- (optional) The grip and handle can be glued together.


- The ratchet is press-fitted to the cylinder.
- (optional) These parts can be glued together.


- The two barrels screw into the frame and hold the covers in place.
- The front sights slide into the top cover.
- (optional) The sights and top cover can be glued together.


- Conduct a function test to ensure all moving parts operate smoothly.
- Make any necessary adjustments.
Congratulations on assembling your 3D printed prop revolver! Always follow safety guidelines during operation and maintenance.
Follow local laws regarding prop/replica weapons, consider adding/printing an orange tip if required in your jurisdiction.